Part of our Basic Calibration service, ICC Profiles are used to apply calibration data at the computer’s operating system level, ensuring consistency across all applications.
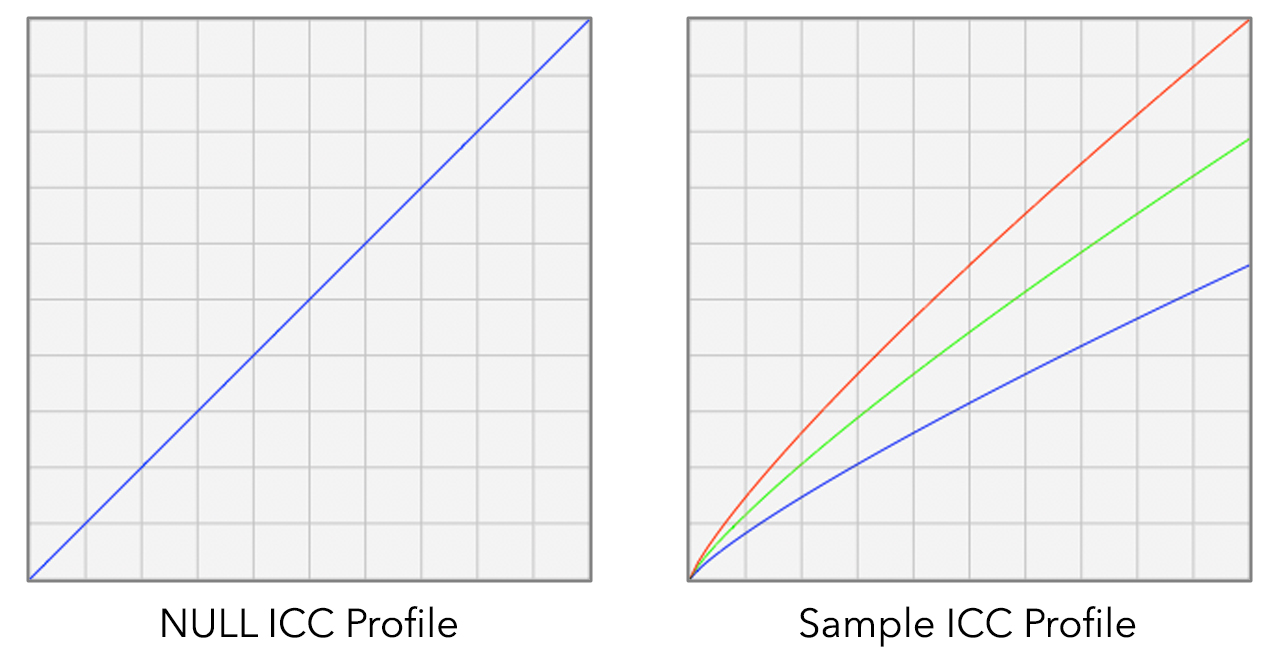
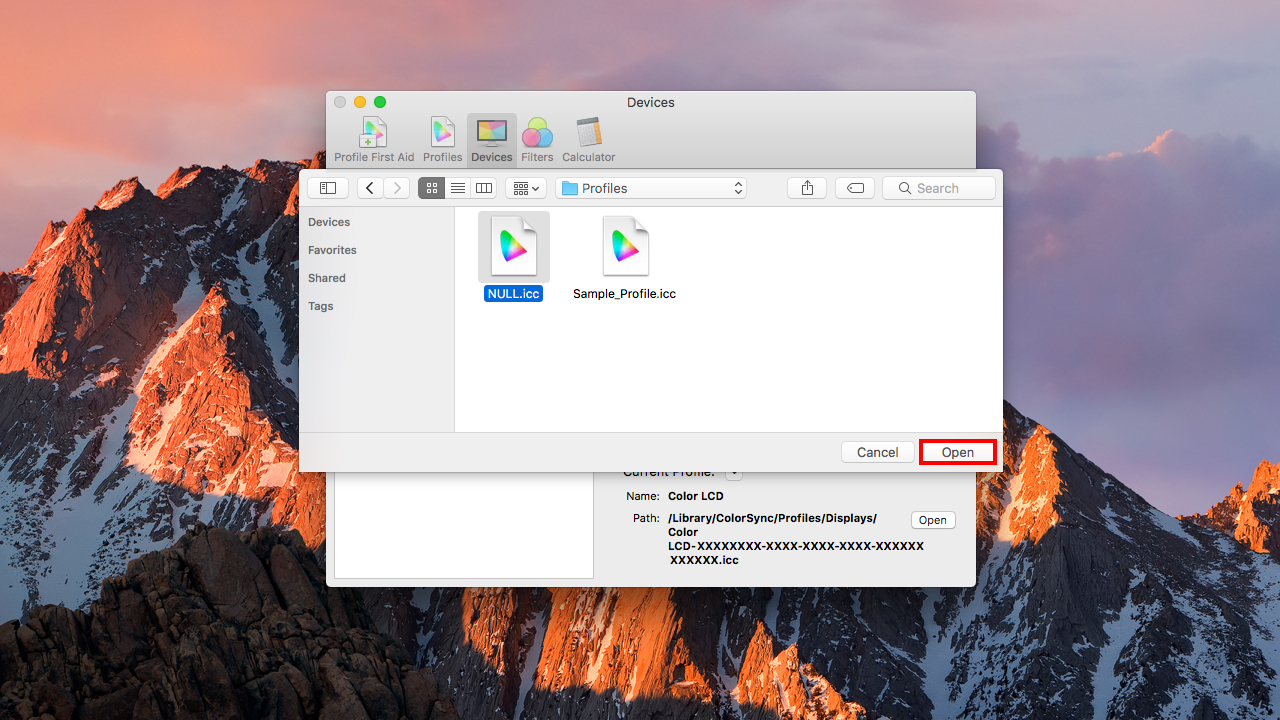
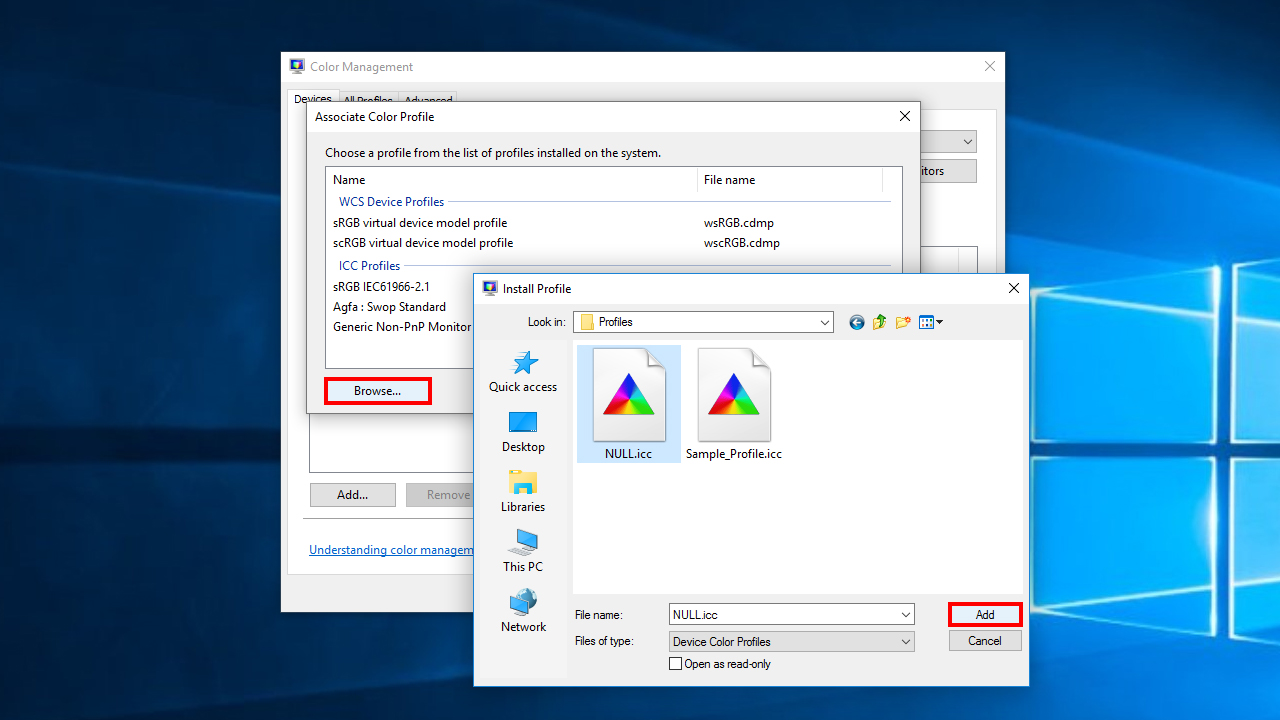
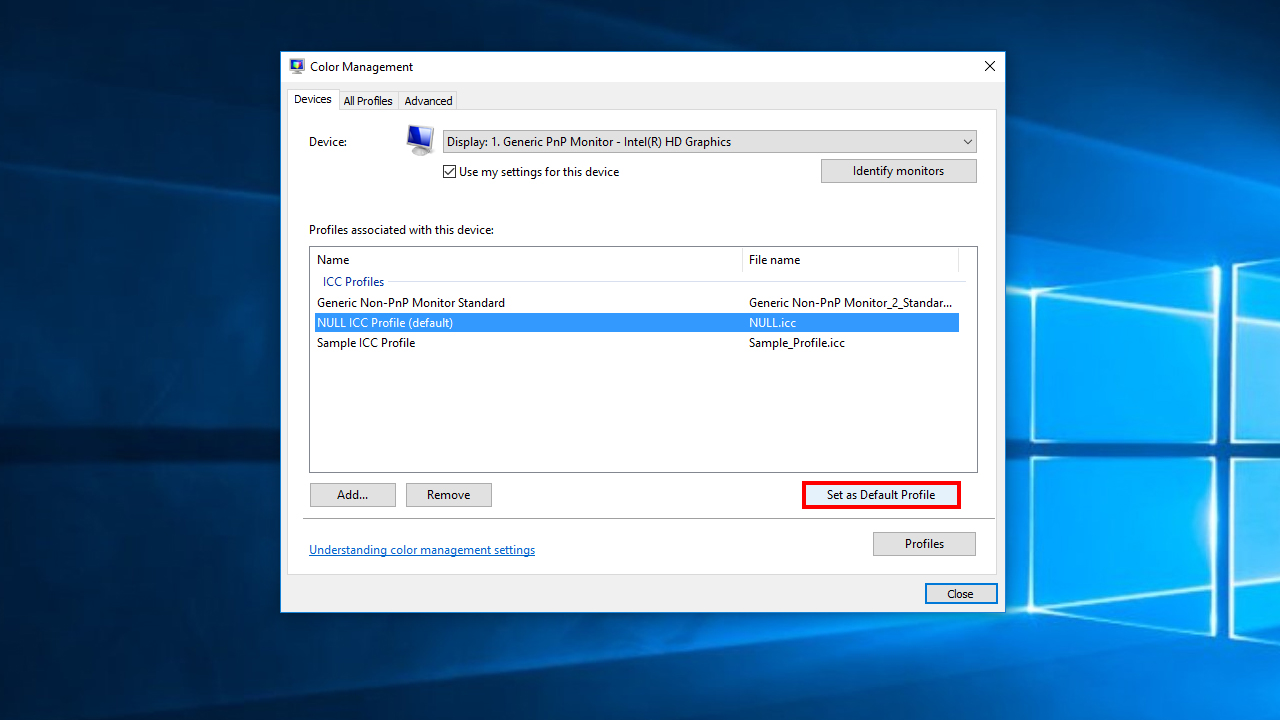
During Windows & Mac calibration, it is important to load a NULL ICC Profile to remove any color adjustments the computer may have added to the display.
We have also included a Sample ICC Profile (using a generic color transform) to visually verify that the ICC Profiles are loading correctly.
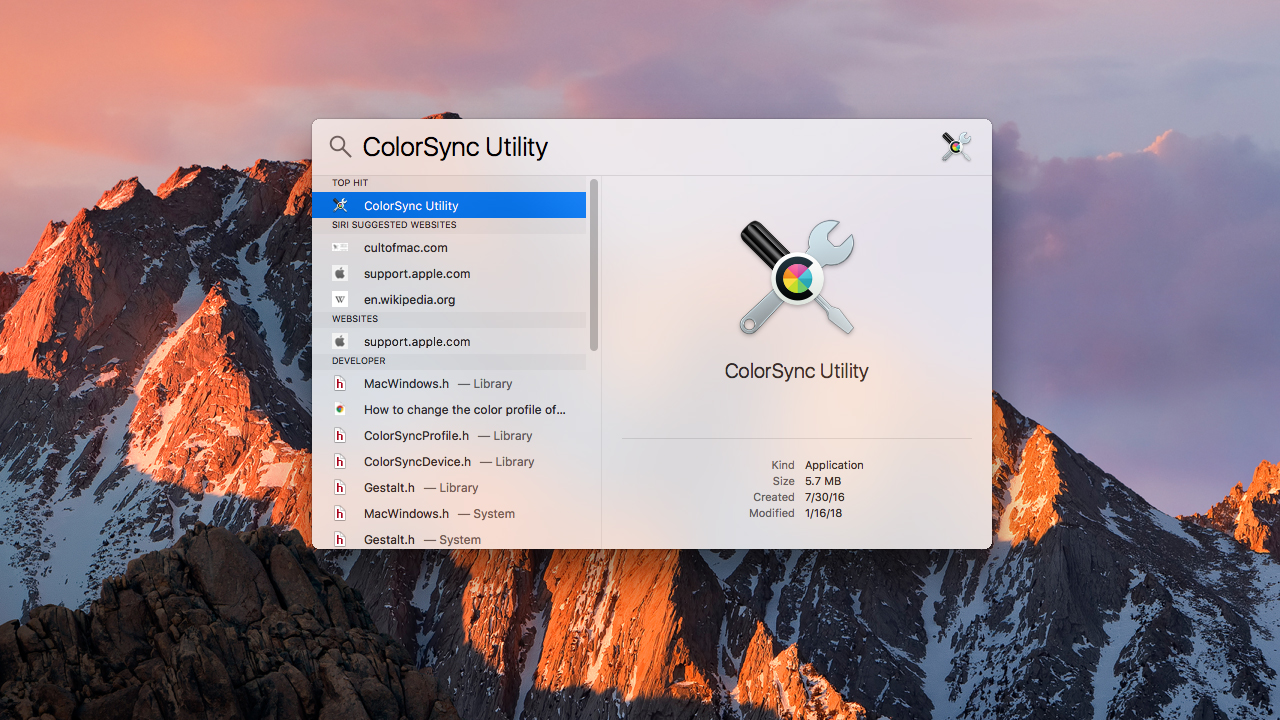
Our Basic Calibration service supports Mac OS X 10.6.8 or later. The following tutorial shows how to load a display calibration ICC Profile using the Mac. View the Windows version.
Note: Some third-party apps (like screen dimming) will need to be disabled before loading a new ICC Profile (or else the computer will need to be restarted afterwards for the changes to take effect).
Our Basic Calibration service supports Windows 7 or later. The following tutorial shows how to load a display calibration ICC Profile using Windows. View the Mac version.
To enable ICC Profiles for multiple displays, right-click on the desktop and choose “Display settings”. Scroll down to “Multiple displays” and set it to “Extend these displays”.
Today there are many stylized “look LUTs” available, designed to make your footage appear more cinematic. But what are these LUTs really doing under the hood?
Analysis
When analyzed against a stress-test image, many of these LUTs exhibit severe banding and color artifacts – negatively affecting the image quality.
The following image has a generic film display LUT applied. On the surface, everything may appear normal:
However, increasing the viewing gamma to 4.0 reveals some problematic areas hiding in the shadows:
In a different example of a LUT implementing a “film look”, isolating the individual red, green, and blue channels shows the unevenness in saturated areas:
While the LUT may appear to work on some shots, inevitably these kinds of LUTs will encounter an image that “breaks” them and sometimes no amount of creative grading can fix the problem. The solution lies in the overall LUT construction.
Quality LUTs
Some may be tempted to abandon LUTs altogether, however LUTs provide the ability to non-linearly adjust color. This is ideal for remapping out-of-gamut colors or when mimicking the characteristics of film.
The real issue comes down to quality, and as the title of this article states: not all LUTs are created equal.
A good LUT doesn’t introduce any artifacts of its own – it cleanly transforms the input color to the output color.
If the source footage contains banding, obviously the LUT can’t improve that (garbage in, garbage out). However, when applied to a high bit-depth image with the expected input parameters, a well-made LUT can work beautifully.
One example of a high-quality look-up table is our free REDcolor4 LUT, which was built to avoid the issues shown above:
When considering using a LUT for a project, it’s a good idea to thoroughly stress-test it beforehand, rather than find out later it’s causing unfixable artifacts.
To use the stress test image: first apply a LUT, then see how it behaves when increasing/decreasing the gamma (applied after the LUT). Also, try viewing the individual red, green, and blue color channels as well.
REDWideGamutRGB is the new standardized colorspace option for RED footage. It can reproduce a much larger range of colors than REDcolor4, which is very useful for shots that have high saturation levels. However, it will look desaturated on a Rec709 monitor.
Our LUT converts REDWideGamutRGB to REDcolor4 using additional saturation mapping for out-of-gamut colors.
Background
Currently Rec709 is the colorspace standard for HDTVs and consumer displays. It is depicted as the triangle below, surrounded by all visible colors of light. If a color falls outside of the triangle, it is considered out-of-gamut and cannot be seen on the display.
Digital cinema cameras (like RED) capture a much wider gamut of color than Rec709 devices can reproduce. In order to view the image properly, some color transformations must take place.
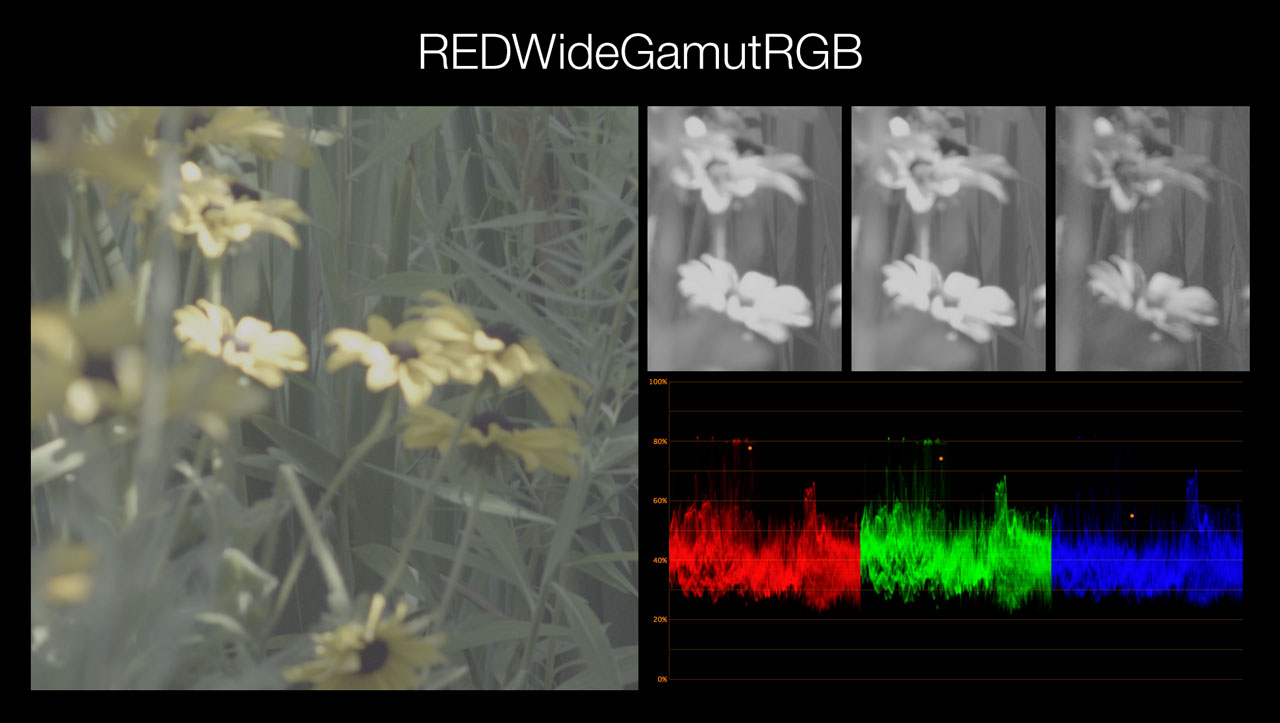
Example
The REDWideGamutRGB colorspace encompasses every color the camera sees, but it appears desaturated on a normal Rec709 device:
REDcolor4 scales up the saturation, but it is unable to reproduce all the colors that were captured by the camera. This eventually can result in clipping image data for out-of-gamut colors:
Using REDWideGamutRGB combined with our REDcolor4 LUT, gamut mapping can be controlled while still achieving a decent level of saturation:
The differences can also be seen on a color chart:
The LUT does not merely increase saturation but instead matches REDWideGamutRGB to REDcolor4 – allowing for more consistency when intercutting footage using both colorspace settings. Learn more about the Camera Profiling process.