Installing ICC Profiles (Windows)
Our Basic Calibration service supports Windows 7 or later. The following tutorial shows how to load a display calibration ICC Profile using Windows. View the Mac version.
Windows 7+
Download the Sample ICC Profiles.
Windows 7+
Default ICC Profile Location: C:\Windows\system32\spool\drivers\color
Note: Currently with a multi-display setup, the screen mode must be set to extended (not duplicated) for the ICC Profiles to load. See Step 4.
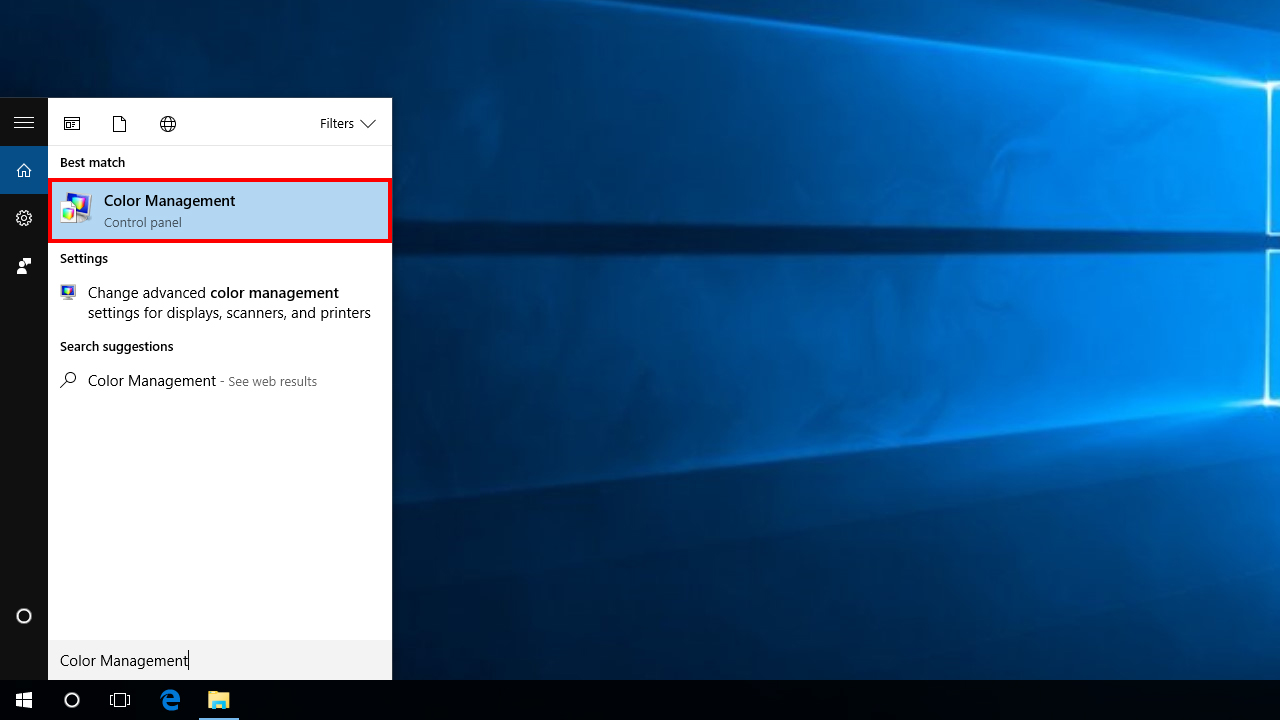
Step 1: Color Management
In the start menu, type “Color Management”, then open the application.
Step 2: Enable Calibration
Note: This step is only required once during initial setup.
Click on the “Advanced” tab, then click “Change system defaults”.

In the new pop-up window click on the “Advanced” tab, then check the box “Use Windows display calibration”. Finally, close the window.

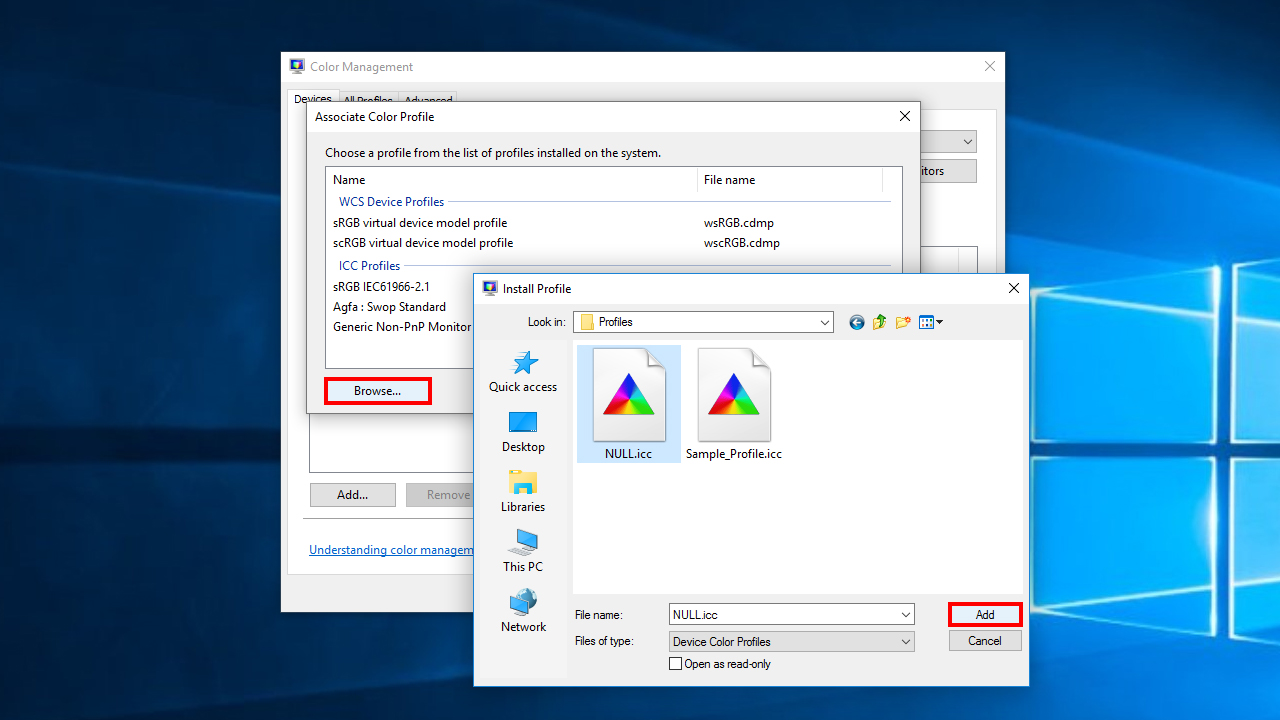
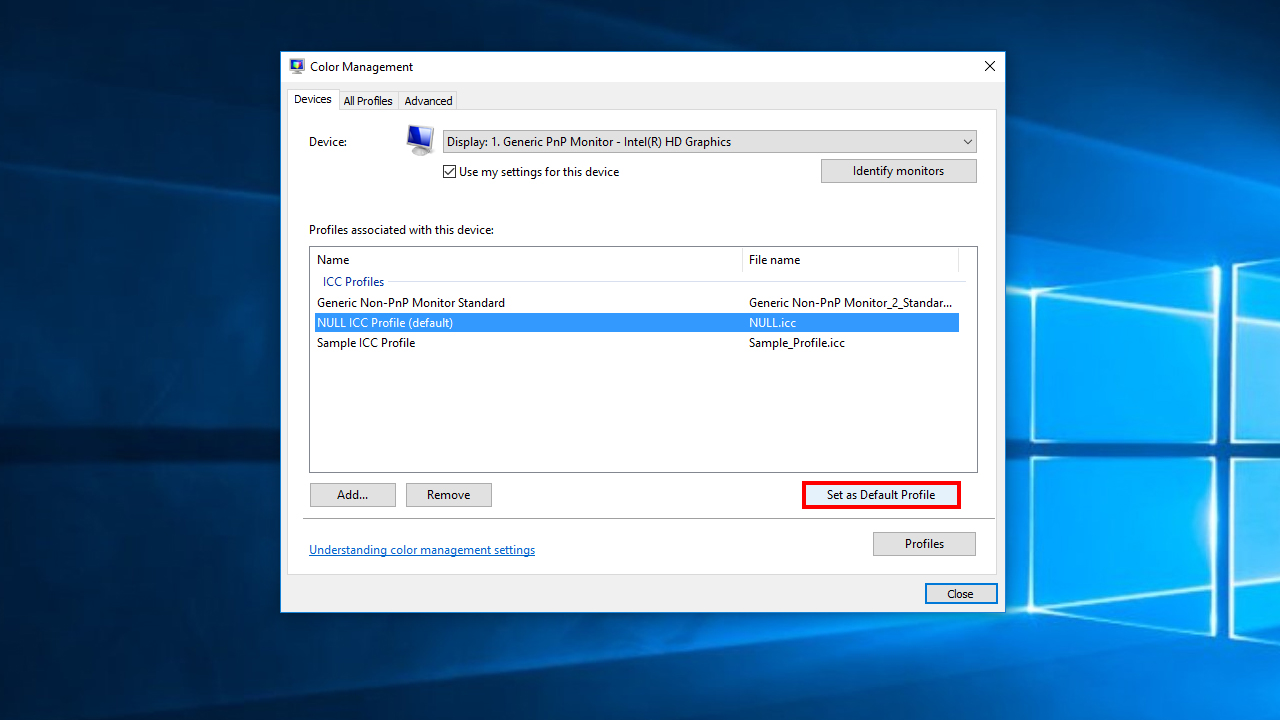
Step 3: Apply ICC Profile
Under the “Devices” tab, select the desired display. Make sure “Use my settings for this device” is checked, then click “Add”.

In the pop-up window, click “Browse” and locate the ICC Profile.
Select the ICC Profile in the list and click “Set as Default Profile”.
Step 4: Multiple Displays
To enable ICC Profiles for multiple displays, right-click on the desktop and choose “Display settings”. Scroll down to “Multiple displays” and set it to “Extend these displays”.

Learn how to install ICC Profiles on a Mac.
Contact
For any questions or inquiries, please contact us.